Bootstrap Checkbox Button
Overview
Sometimes the most basic details might probably get pretty critical-- specifically when you come to need them. For instance just how do your site visitors connect with the webpages you set up claiming a simple Boolean action-- simply just yes or no pertaining to some of the questions you need to request, just how they do approve the conditions and terms or maybe line up a handful of the possible options they might have. We normally surpass this without paying enough of an recognition to the feature chargeable for these types of actions yet the Bootstrap Checkbox Button is certainly a very serious component-- one our forms just can't actually do without.
Inside current fourth version of the Bootstrap system we are offered with the
.form-check.form-check-label<div>.form-check.form-check-label<label><input>.form-check-inputThe best way to work with the Bootstrap checkbox:
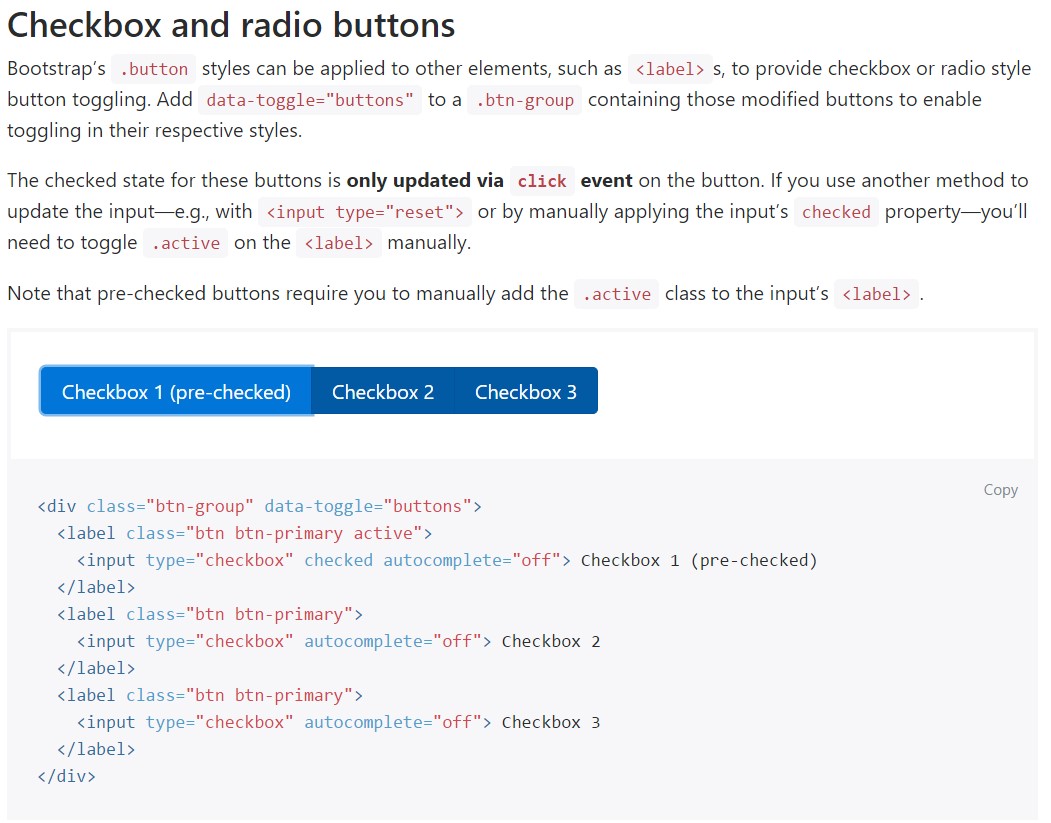
The inspected condition for these kinds of buttons is only improved through click event on the button. If you make use of another solution to upgrade the input-- e.g., with
<input type="reset">.active<label>
<div class="btn-group" data-toggle="buttons">
  <label class="btn btn-primary active">
    <input type="checkbox" checked autocomplete="off"> Checkbox 1 (pre-checked)
  </label>
  <label class="btn btn-primary">
    <input type="checkbox" autocomplete="off"> Checkbox 2
  </label>
  <label class="btn btn-primary">
    <input type="checkbox" autocomplete="off"> Checkbox 3
  </label>
</div>
In certain cases we want to have the checkboxes to take place within our forms without the customer truly being capable to make some action selecting them-- that is really where the disabled option comes out.
If you want to disable effectively a checkbox in Bootstrap 4 employing the typical HTML attribute
disabledIf you like the suggestion and clearly wish to accomplish this you must appoint the
.disabled.form-checkSome other representation
If applying checkboxes, wrap them in a
<label>.custom-control.custom-checkboxApply
.custom-control-input<input>In addition utilize two
<span>.custom-control-indicator.custom-control-description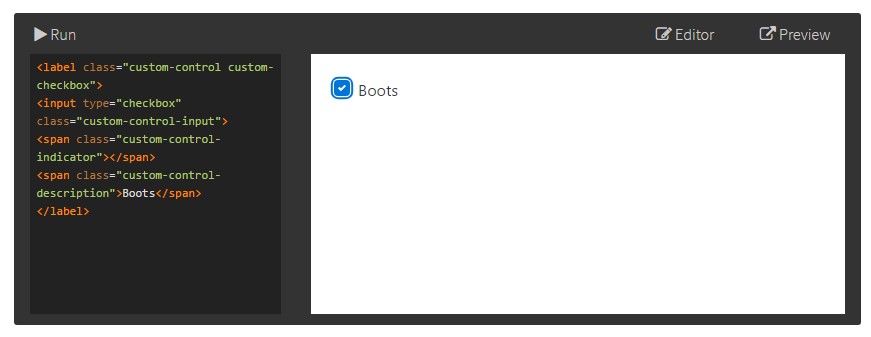
<label class="custom-control custom-checkbox">
<input type="checkbox" class="custom-control-input">
<span class="custom-control-indicator"></span>
<span class="custom-control-description">Boots</span>
</label>
Bootstrap Checkbox Form forms
Default checkboxes and radios are raised upon with the assistance of
.form-checkDisabled checkboxes and radios are maintained, but to give a
not-allowed<label>.disabled.form-checkA brand new element for the Bootstrap edition 4 framework is the creation of the so called custom-made form components. These are the similar elements we are known in practicality yet designated much more pleasing and in the Bootstrap way. With them you can surely provide certain spice as well as charm to your content via simply just selecting a couple of supplemental classes to the commands you involve in your forms.
To employ custom checkboxes wrap them within a
<label>.custom-control.custom-checkbox<input>.custom-control-input<span>.custom-control-indicator.custom-control-descriptionConclusions
That's basically everything you ought to produce in order to insert a checkbox element within your Bootstrap 4 powered website page and bring in a number of custom made flavor to it adding in it a fancy appearances. And now everything you require to do is repeat the drill unless you've inspected all of the checkboxes wanted are actually on the web page.
Check out a number of youtube video short training about Bootstrap checkbox
Related topics:
Bootstrap checkbox main documents
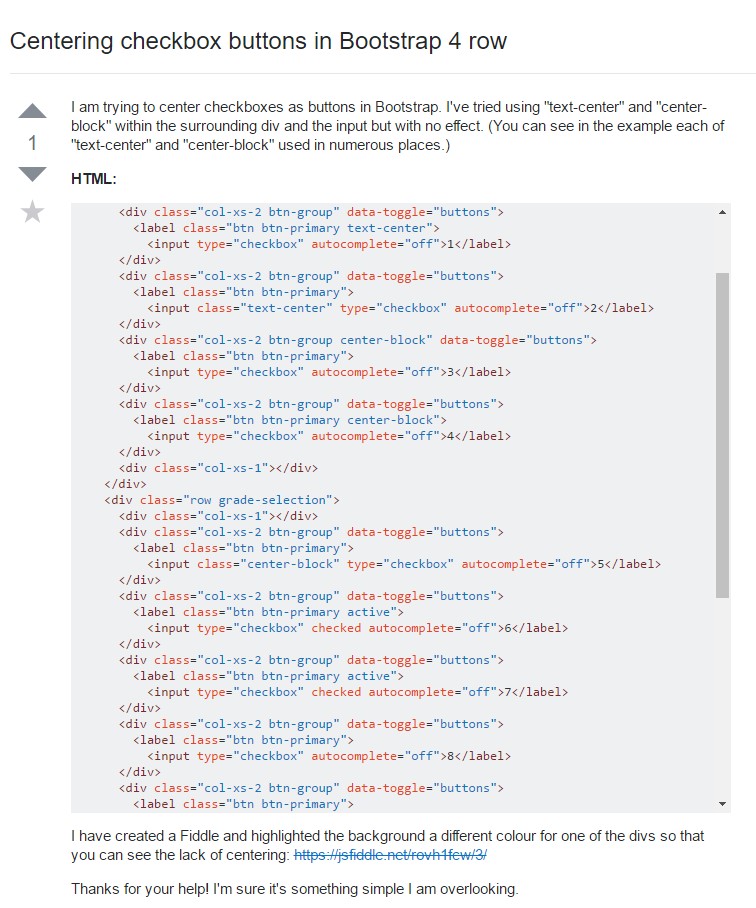
Centering checkbox buttons in Bootstrap 4 row
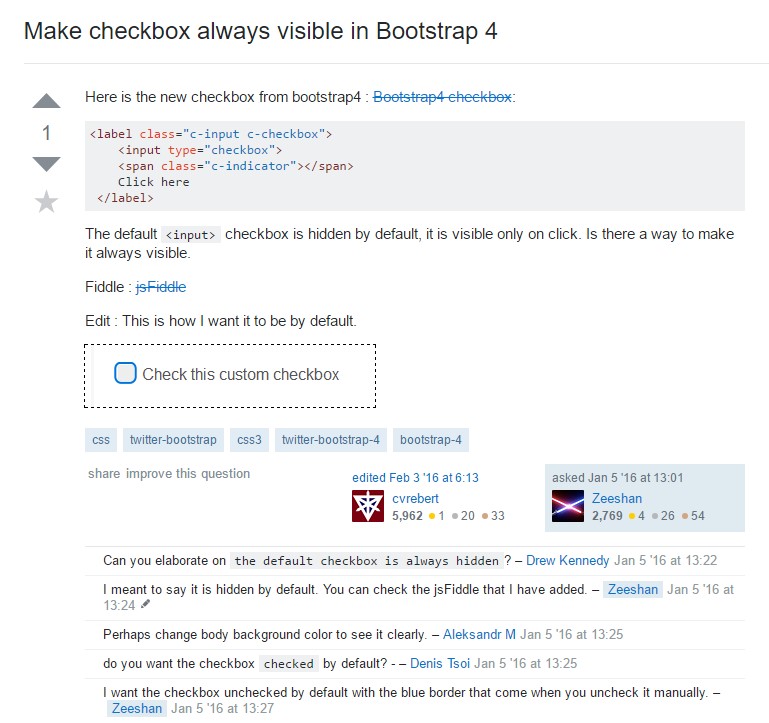
Make checkbox always visible in Bootstrap 4